


When it comes to personalizing and protecting your vehicle, few modifications offer as many benefits as car window film installation. This relatively simple upgrade not only enhances the aesthetic appeal of your car but also provides significant functional advantages, including UV protection, heat reduction, and increased privacy. This guide will walk you through everything you need to know about car window film installation, from the types of films available to the installation process and maintenance tips.
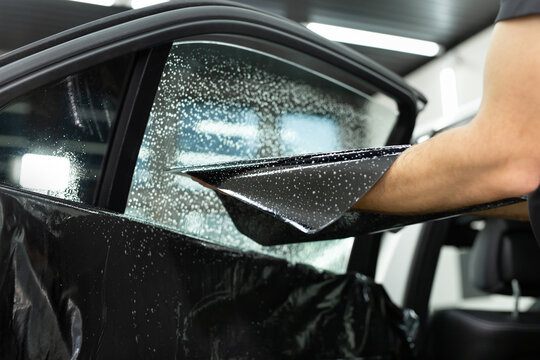
Table of Contents
ToggleUnderstanding Car Window Films
Car window films, also known as window tints, are thin layers of laminate film that can be applied to the interior or exterior of your vehicle’s glass surfaces. These films come in various shades and materials, each offering unique benefits:
- Dyed Window Film: This is the most affordable option and provides excellent glare reduction and privacy. However, it may fade over time.
- Metalized Film: Contains metal particles that reflect heat and UV rays, offering durability and efficiency. However, it can interfere with electronic signals.
- Carbon Film: Known for its matte finish and non-reflective appearance, carbon film provides excellent UV protection and does not fade over time.
- Ceramic Film: The highest-quality option, ceramic film offers superior heat reduction, UV protection, and clarity without signal interference. It is also the most expensive.
Benefits of Car Window Film
- UV Protection: Window films block up to 99% of harmful UV rays, protecting your skin and the car’s interior from sun damage.
- Heat Reduction: By reflecting solar energy, window films can significantly reduce the internal temperature of your vehicle, enhancing comfort and reducing the need for air conditioning.
- Glare Reduction: Tinted windows reduce glare from the sun and headlights, improving driving safety.
- Privacy and Security: Darker tints offer increased privacy for passengers and can deter potential thieves by obscuring the view of your car’s interior.
- Aesthetic Appeal: Window films can enhance the look of your vehicle, giving it a sleek and polished appearance.
DIY Installation vs. Professional Installation
Installing car window film can be a DIY project if you have the right tools and patience. However, professional installation ensures a flawless finish and usually comes with a warranty. Here’s a comparison:
DIY Installation:
- Pros: Cost-effective, flexible scheduling, and a sense of accomplishment.
- Cons: Requires precision and patience, risk of bubbles and creases, and potential lack of professional-grade tools.
Professional Installation:
- Pros: Expertise and experience, high-quality finish, warranty coverage, and access to high-end films.
- Cons: Higher cost and need to schedule an appointment.
Step-by-Step Guide to DIY Car Window Film Installation
If you decide to install the window film yourself, follow these steps for the best results:
- Preparation:
- Materials Needed: Window film, application solution (usually a mixture of water and baby shampoo), squeegee, utility knife, heat gun, and microfiber cloth.
- Clean the Windows: Thoroughly clean the interior and exterior of the windows with a glass cleaner to remove any dirt and debris.
- Measuring and Cutting:
- Measure the dimensions of your windows and cut the film to size, leaving an extra inch on each side to ensure complete coverage.
- Applying the Film:
- Spray the Window: Generously spray the window with the application solution.
- Remove Backing: Carefully peel the backing from the film.
- Position the Film: Place the adhesive side of the film onto the wet window, starting at the top and working your way down.
- Smoothing the Film:
- Use the squeegee to smooth out the film, starting from the center and moving towards the edges to remove air bubbles and excess solution.
- Trim Excess Film: Once the film is in place, use the utility knife to trim any excess film from the edges of the window.
- Final Touches:
- Use the heat gun to gently warm the film, which will help it conform to the curvature of the glass and adhere more effectively.
- Allow the film to cure for a few days before rolling down the windows to ensure proper adhesion.
Maintenance Tips
To keep your window film in top condition, follow these maintenance tips:
- Avoid Rolling Down Windows: For at least a week after installation to allow the film to fully adhere.
- Gentle Cleaning: Use a soft cloth and mild, ammonia-free cleaner to clean the windows. Avoid abrasive materials that could scratch the film.
- Regular Inspections: Check for any signs of bubbling or peeling, especially around the edges, and address them promptly to prevent further damage.
Conclusion
Car window film installation is a worthwhile investment that offers numerous benefits, from UV protection to enhanced privacy. Whether you choose to do it yourself or opt for professional installation, the key is to select the right type of film for your needs and ensure it is applied correctly. With proper installation and maintenance, window films can significantly enhance your driving experience, making your vehicle safer, more comfortable, and more stylish.